Super Bowl Dessert Mini Cheesecake Cups
Highlighted under: Festive Food
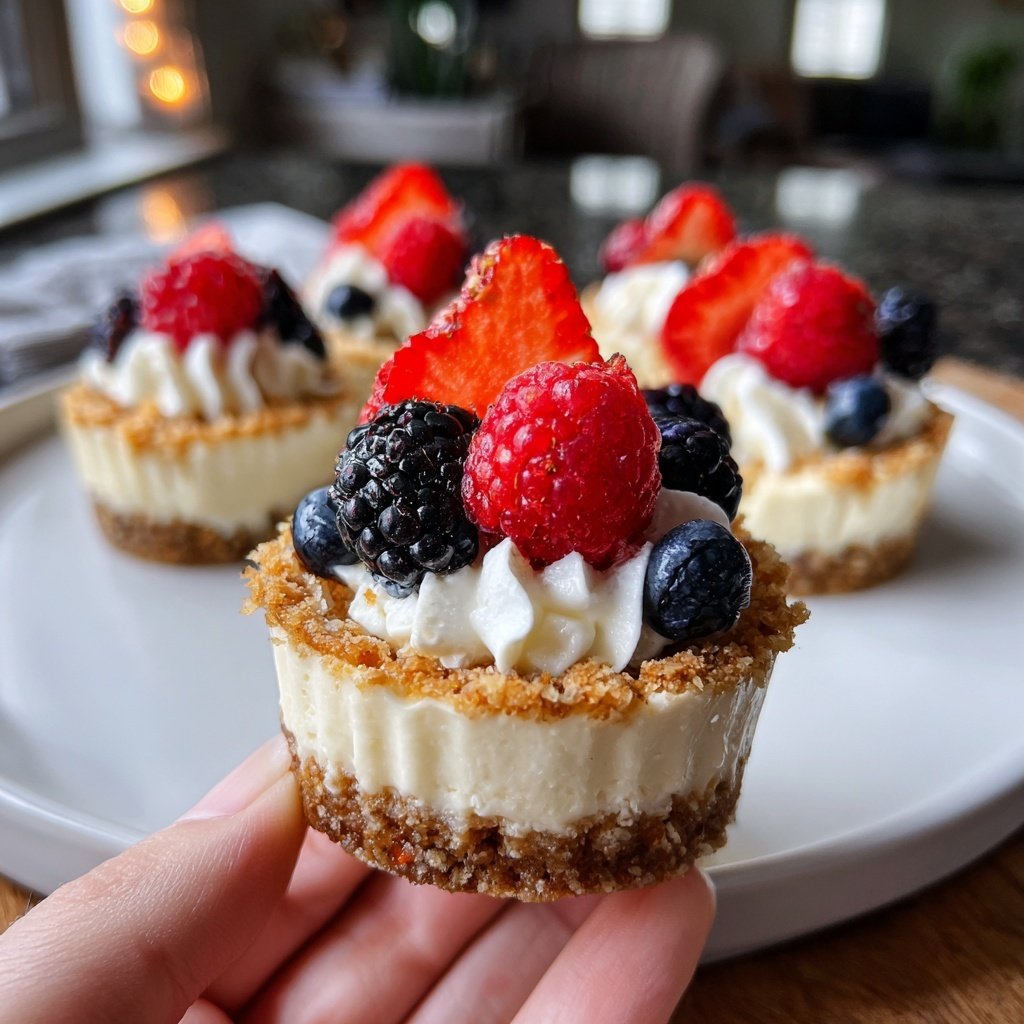
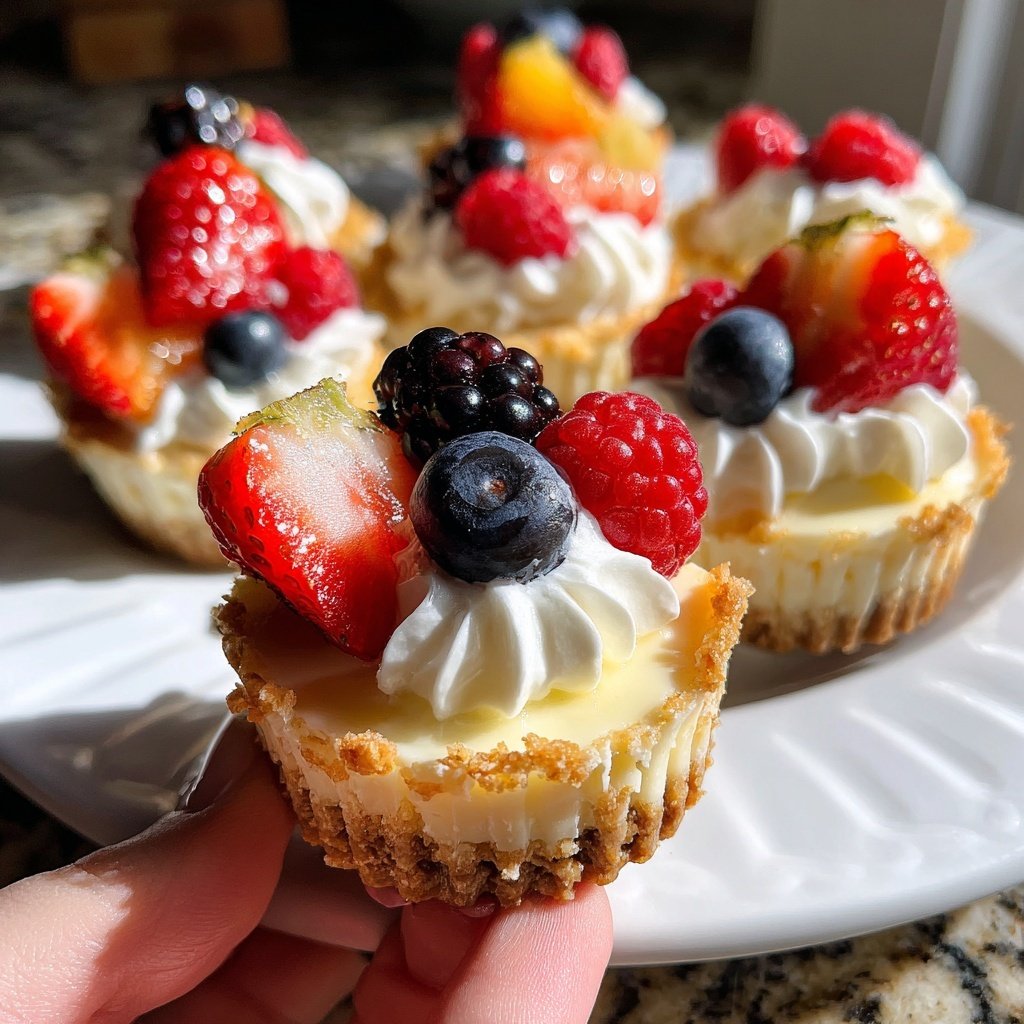
I absolutely love creating unique desserts that are perfect for game day! These Super Bowl Dessert Mini Cheesecake Cups are not only delicious, but they're also a fun twist on traditional cheesecake. Each little cup combines creamy cheesecake filling with a delightful graham cracker crust, making them the perfect handheld treat. I enjoy assembling these miniatures to share during the big game, and they always receive rave reviews. Plus, they’re easy to customize with different toppings, catering to a variety of tastes!
When I first made these mini cheesecake cups, I was amazed at how quickly they came together. Mixing the cream cheese with sugar and vanilla creates a smooth and rich filling that I could eat by the spoonful! I chose to bake the crust instead of using a no-bake option to achieve an added crispiness that complements the creamy filling perfectly.
To make them even more special, I love experimenting with different toppings—whether it’s fresh fruit, chocolate drizzle, or a sprinkle of nuts. Serving these during the Super Bowl has become a cherished tradition in my home, and I can't wait for everyone to dig in!
Why You'll Love These Cups
- Individual servings that are easy to grab and enjoy
- Creamy cheesecake filling balanced with a crunchy crust
- Customizable toppings to suit every guest's preference
Creating the Perfect Cheesecake Texture
To achieve that rich and creamy texture in your cheesecake filling, it's crucial to start with softened cream cheese. I recommend leaving it at room temperature for at least 30 minutes before mixing. This not only makes it easier to blend but also prevents lumps in your filling. Be sure to use a hand mixer or stand mixer on medium speed, mixing until the cream cheese is smooth and glossy before adding the sugar and vanilla extract.
Another key aspect of the filling is folding in the whipped cream. This step lightens the mixture while maintaining its rich flavor. Instead of stirring, use a rubber spatula and gently fold the whipped cream into the cream cheese mixture. This technique ensures you retain the airy texture, rather than deflating the whipped cream, which can lead to a denser outcome.
Perfecting Your Graham Cracker Crust
When making the graham cracker crust, be sure to finely crush the graham crackers. You can do this easily by placing them in a food processor or putting them in a zip-top bag and crushing them with a rolling pin. This ensures even distribution and a consistent texture in each cup. Additionally, the ratio of melted butter to graham cracker crumbs is crucial; too much butter can result in an overly greasy crust, while too little may lead to a crumbly texture that doesn’t hold together.
After baking the crusts, make sure to let them cool completely before adding the cheesecake filling. This step prevents the warm crust from melting the filling, which can compromise its texture and structure. You can check if they're cool by lightly touching the surface; it should be cool to the touch and firm enough to hold its shape.
Customizing and Serving Your Mini Cheesecakes
The beauty of these mini cheesecake cups lies in their versatility. While fresh berries and chocolate sauce are excellent topping choices, consider seasonal fruits or different sauces based on your preference or what’s available. You can also experiment with crushed cookies or even a sprinkle of toffee bits for a crunchy texture. If you’re serving a group with diverse tastes, provide an assortment of toppings on the side to let guests customize their desserts.
If you want to prepare these cups ahead of time, they can be made up to two days in advance, making them an ideal option for busy game day prep. Just keep them covered in the refrigerator. For a fun presentation, consider using clear plastic cups instead of muffin liners—this way, guests can see the beautiful layers of crust and cheesecake filling. Just remember to add toppings just before serving to keep them fresh!
Ingredients
Gather these simple ingredients to make your mini cheesecake cups:
For the Crust
- 1 cup graham cracker crumbs
- 1/4 cup melted butter
- 2 tablespoons sugar
For the Cheesecake Filling
- 8 oz cream cheese, softened
- 1/2 cup sugar
- 1 teaspoon vanilla extract
- 1 cup whipped cream
For Toppings (optional)
- Fresh berries
- Chocolate sauce
- Caramel drizzle
- Chopped nuts
Instructions
Follow these steps to create your delicious mini cheesecakes:
Preheat and Prepare
Preheat your oven to 350°F (175°C). In a bowl, mix together the graham cracker crumbs, melted butter, and sugar until well combined.
Form the Crusts
Line a muffin tin with cupcake liners. Press the graham cracker mixture into the bottom of each liner evenly.
Bake the Crusts
Bake the crusts in the preheated oven for about 10 minutes or until golden brown. Remove from the oven and let them cool while you prepare the filling.
Make the Filling
In a medium bowl, beat together the softened cream cheese, sugar, and vanilla extract until smooth. Fold in the whipped cream carefully.
Fill the Cups
Spoon the cheesecake filling into the cooled crusts, filling them to the top. Refrigerate for at least 1 hour to set.
Add Toppings and Serve
Before serving, add your choice of toppings such as fresh berries or a drizzle of chocolate sauce. Enjoy your mini cheesecake cups!
Pro Tips
- For best results, let the cheesecake cups chill in the refrigerator for a few hours or overnight for a firmer texture.
Substitutions for Dietary Needs
This recipe can easily accommodate various dietary preferences. If you’re looking for a gluten-free option, simply swap graham crackers for gluten-free cookies or graham cracker crumbs, which are widely available. Additionally, you can substitute the cream cheese with a dairy-free cream cheese alternative if you're catering to lactose-intolerant guests. Just be sure to check the packaging for creaminess comparison to ensure the best texture in your filling.
For a lower-sugar option, consider using a sugar substitute like erythritol or stevia in both the crust and filling. However, remember to follow the conversion guidelines on the package, as these sweeteners vary in sweetness compared to traditional sugar. Lastly, if you're short on time, pre-made graham cracker crusts work well as a convenient alternative.
Troubleshooting Common Issues
If your cheesecake filling seems too runny after mixing, it may be due to over-mixing the whipped cream or under-mixing the cream cheese. Ensure the cream cheese is fully incorporated before folding in the whipped cream; this is vital for achieving the right consistency. If you find your filling won’t set properly after refrigeration, it might need more time to chill, especially if your kitchen is warm. Aim for at least one hour, but two is often better for firmer mini cheesecakes.
Another common issue is the crust crumbling when served. This can happen if the butter isn’t evenly distributed during mixing or if it’s baked for too long. Monitor them closely; they should be just golden brown and not overcooked. If you find your crust crumbles too easily, you can increase the butter slightly or press the crust mixture down more firmly before baking to help it hold together better.
Questions About Recipes
→ Can I make these cheesecake cups in advance?
Absolutely! They can be made a day ahead and stored in the refrigerator until ready to serve.
→ What other toppings can I use?
Feel free to get creative! You can use crushed cookies, fruit compote, or even a layer of chocolate ganache.
→ Is it possible to make a gluten-free version?
Yes! Substitute graham cracker crumbs with gluten-free crumbs made from nuts or gluten-free cookies.
→ How long do the cheesecake cups last in the fridge?
They should stay fresh for about 3-4 days in the refrigerator, if they last that long!
Super Bowl Dessert Mini Cheesecake Cups
Created by: Zadie Whitmore
Recipe Type: Festive Food
Skill Level: Beginner
Final Quantity: 12 mini cups
What You'll Need
For the Crust
- 1 cup graham cracker crumbs
- 1/4 cup melted butter
- 2 tablespoons sugar
For the Cheesecake Filling
- 8 oz cream cheese, softened
- 1/2 cup sugar
- 1 teaspoon vanilla extract
- 1 cup whipped cream
For Toppings (optional)
- Fresh berries
- Chocolate sauce
- Caramel drizzle
- Chopped nuts
How-To Steps
Preheat your oven to 350°F (175°C). In a bowl, mix together the graham cracker crumbs, melted butter, and sugar until well combined.
Line a muffin tin with cupcake liners. Press the graham cracker mixture into the bottom of each liner evenly.
Bake the crusts in the preheated oven for about 10 minutes or until golden brown. Remove from the oven and let them cool while you prepare the filling.
In a medium bowl, beat together the softened cream cheese, sugar, and vanilla extract until smooth. Fold in the whipped cream carefully.
Spoon the cheesecake filling into the cooled crusts, filling them to the top. Refrigerate for at least 1 hour to set.
Before serving, add your choice of toppings such as fresh berries or a drizzle of chocolate sauce. Enjoy your mini cheesecake cups!
Extra Tips
- For best results, let the cheesecake cups chill in the refrigerator for a few hours or overnight for a firmer texture.
Nutritional Breakdown (Per Serving)
- Calories: 150 kcal
- Total Fat: 10g
- Saturated Fat: 6g
- Cholesterol: 30mg
- Sodium: 80mg
- Total Carbohydrates: 13g
- Dietary Fiber: 0g
- Sugars: 8g
- Protein: 3g